2020-10 upd: we reached the first fundraising goal and rented a server in Hetzner for development! Thank you for donating !
Operation with bhyve virtual machine
Attention! Current pages describe CBSD version 13.0.x. If you are using an older version, please update first.
Attention! I apologize for the automatic translation of this text. You can improve it by sending me a more correct version of the text or fix html pages via GITHUB repository.
bhyve virtual machine create via dialog menu
Commands: bcreate, bconstruct-tui
                % cbsd bconstruct-tui
                % cbsd bcreate jconf=/path/to/conf.jconf
The virtual machine is created on a pre-formed configuration file through cbsd bcreate jconf=path_to_cfg.
For the configuration process, you can use the script cbsd bconstruct-tui, or use WEB interface.
To create a via DIALOG:
% cbsd bconstruct-tui
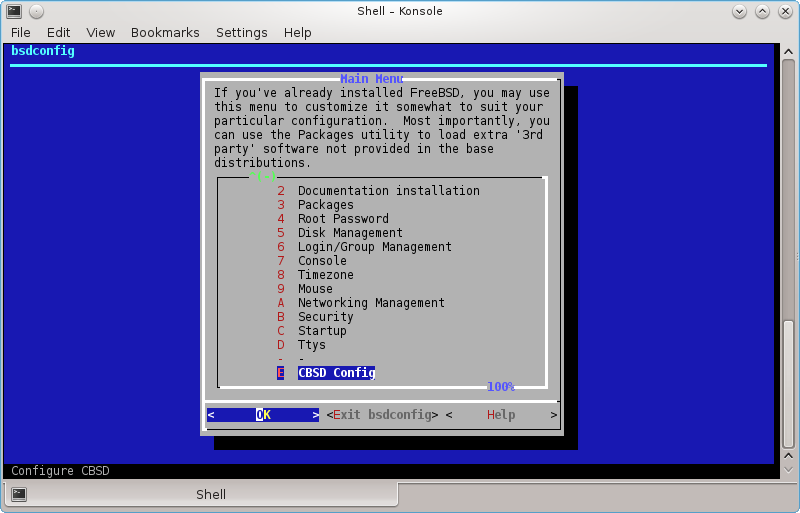
The same menu is available to create a jail when configuring CBSD via bsdconfig
If bconstruct-tui worked correctly, at the end you will be asked to create a virtual machine. In the case of positive response, bcreate will be made to the new configuration automatically. Otherwise, script displays the path to the configuration file (in $workdir/tmp), on which you can create a VM.
Virtual Machine Profiles
Profiles that come with CBSD and on which systems determine the URL from which the ISO image is downloaded, placed in the catalog ~workdir/etc/defaults/ and start with the prefix vm-
. For example, you can see the profiles list by command:
% ls -1 ~cbsd/etc/defaults | grep ^vm-
vm-dflybsd-x86-5.conf
vm-freebsd-FreeBSD-x64-11.1.conf
vm-freebsd-FreeBSD-x64-12.0-LATEST.conf
vm-freebsd-FreeNAS-x64-11.conf
vm-freebsd-pfSense-2-RELEASE-amd64.conf
vm-linux-CentOS-7.4-x86_64.conf
vm-linux-Debian-x86-9.conf
vm-linux-fedora-server-26-x86_64.conf
Since the CBSD releases come out much less often than the versions of the various distributions, these profiles may expire quickly enough, and as a result, the image becomes inaccessible by the old links.
In order not to get into similar situations and get new profiles, you can update them separately from CBSD with the Makefile in the ~workdir/etc directory. There are two commands in the Makefile (you will see them if you just write make in this directory):
- make profiles-create - is done once by starting the git repository from the GitHub: https://github.com/cbsd/cbsd-vmprofiles
- make profiles-update - is done every time (after profiles-create) when you want to update profiles
Since these operations are used by git, you must first install it in the system: pkg install devel/git (or from the ports: make -C /usr/ports/devel/git install)
For example:
% cd ~cbsd/etc
% make profiles-create
% make profiles-update
If you notice that some version of the profile is out of date and in the repository https://github.com/cbsd/cbsd-vmprofiles no one sent a correction, you can contribute CBSD by sending changes (in the old profile or creating a new one) independently through Pull Request, having an account on github.com
Creating your own virtual machine profiles
If your desired OS profile is missing from the CBSD distribution, or for some reason you are unsatisfied, you can create your profile by analogy with an existing one
Custom profiles must be located in the ~cbsd/etc directory (for example, /usr/jails/etc), while the original CBSD profiles are in directory ~cbsd/etc/defaults (for example, /usr/jails/etc/defaults)
If you edit files in the ~cbsd/etc/defaults directory, all your changes will be deleted each time you update CBSD
If you want to overwrite the original profile, just copy it to the ~cbsd/etc directory and edit it. In this case, with the same profile names, the system will always prefer the profile from the ~cbsd/etc directory, despite its presence in the ~cbsd/etc/defaults directory.
When creating a new profile, please observe the following rules:
- the file name must begin with vm-"os-type"-XXX.conf, where os-type - type of OS, e.g: freebsd, openbsd, linux, windows, other
- Inside the profile this arguments are mandatory: long_description, vm_profile и vm_os_type
- long_description contains an arbitrary description, for example: long_description="Linux Debian 9.2.1"
- vm_os_type - contains the OS type and must also be in the file name. So, if the OS type is linux, write: vm_os_type="linux", and the profile file will begin with vm-linux-
- vm_profile - the name of the profile, which also forms part of the profile file name. For example, if you created a profile for Debian 9.2.1, you can write vm_profile="Debian-9.2.1", and the full name of the profile file will be: vm-linux-Debian-9.2.1.conf
Where:
The remaining parameters are optional (as the number of cores, RAM, the default virtual machine name, various bhyve settings), and if they are not in the profile, common values will be used from etc/defaults/bhyve-default-default.conf, which you can also copy it to etc/bhyve-default-default.conf if the global parameters do not suit you and you want to edit them
Also, look at the fetch, iso_img, register_iso_name, and register_iso_as options.
If you create a virtual machine profile that you can retrieve over the network, you will most likely need them.
fetch says CBSD whether an ISO image is available for download (0-no, 1-yes)
iso_img points to the name of the ISO image, as it is called from the source where to download it (for example, ubuntu-17.04-server-amd64.iso)
The parameters register_iso_name and register_iso_as control how to save the image to be downloaded and under what name to register in CBSD media, for example:
register_iso_name="cbsd-iso-ubuntu-17.04-server-amd64.iso"
register_iso_as="iso-Ubuntu-Server-17.04"
If an ISO image is downloaded from the site, but an archive with an ISO image, for example .tgz or .gz or .xz etc. (for example, the vm-dflybsd - profile), you can specify the command to unzip, using the iso_extract parameter, for example:
iso_extract="bzip2 -d "
And of course, it's always useful to see how original images are written, the profile of which can be taken as a basis.
If you created a working OS profile, you can send it to the repository https://github.com/cbsd/cbsd-vmprofiles having an account on GitHub, thereby making other users CBSD happy. Also, this profile will be included in the next release of CBSD and you will become participant of the project!
Options and their brief description, which appear in the dialogue form. Depending on the type and profile of the OS, some of them may not be available:
- vm_os_type - type of OS. Depending on the type of the guest OS will be offered a particular profile set distributions
- vm_os_profile - select the profile distribution. A profile can contain as proposed default parameters described below, as well as specific distro settings (URL for the image, kernel boot options, etc.)
- imgsize - Size for the first virtual image. If the guest OS - FreeBSD profile and FreeBSD-from-jail (image generation through jail2iso), this parameter indicates the amount of free space after copying distribution
- jname - the name of the virtual machine, in a one word.
- host_hostname - relevant only to the guest OS FreeBSD and Profile FreeBSD-from-jail: set the hostname in /etc/rc.conf guest OS to the appropriate value
- vm_ram - allocated RAM
- vm_cpus - the number of virtual cores
- vm_hostbridge - guest OS host bridge. Maybe hostbridge or amd_hostbridge (affects the PCI vendor ID)
- astart - sign automatically start the virtual machine with the boot node
- interface - uplink interface for tap-interface, the first network card of the virtual machine
- pkglist - relevant only to the guest OS FreeBSD and Profile FreeBSD-from-jail: select the appropriate pekedzhi to be pre-installed in the created VM
- ip4_addr - relevant only to the guest OS FreeBSD and Profile FreeBSD-from-jail: set the ifconfig_NIC /etc/rc.conf in the guest OS to the appropriate value - can be an IP address or a 'DHCP'
- gw4 - relevant only to the guest OS FreeBSD and Profile FreeBSD-from-jail: install defaultrouter parameter /etc/rc.conf guest OS to the appropriate value
- ver - relevant only to the guest OS FreeBSD and Profile FreeBSD-from-jail: use the base and kernel of the specified version (for example 10.1, 11.0, 12)
- applytpl - relevant only to the guest OS FreeBSD and Profile FreeBSD-from-jail: whether to apply additional settings (/etc/hosts, /etc/make.conf)
- floatresolv - relevant only to the guest OS FreeBSD and Profile FreeBSD-from-jail: set /etc/resolv.conf servers listed in the parameter jnameserver
- arch - relevant only to the guest OS FreeBSD and Profile FreeBSD-from-jail: use the base and kernel of this architecture (eg i386, amd64)
Virtual Machine Configuring
commands: bconfig, bset
                        % cbsd bconfig
                        % cbsd bset
Description:
Configuring the Virtual Machine Settings
Each virtual machine CBSD stores the settings in the SQLite3 database. To change the settings of a VM can serve command cbsd bconfig, TUI launches menu for changing the basic settings.
Description of relevant parameters, you can read on the page VM create
Custom scripts for starting and stopping action on jail
You can write your own scripts to be executed within the jail and in the master host on startup and shutdown of the environment. For this, the system directory of jail ( $workdir/jails-system/$jname/ ) have the following directories:
- master_poststart.d - scripts for executing in the master host after jail starts (Be careful, because the scripts are is not jailed)
- master_poststop.d - scripts for executiong in the master host after jail stops (Be careful, because the scripts are is not jailed)
- master_prestart.d - scripts for executing in master host before jail starts (Be careful, because the scripts are is not jailed)
- master_prestop.d - scripts for execution in master host after jail stops (Be careful, because the scripts are is not jailed)
- start.d - scripts for execution within jail when jail is starts. Analog of parameter exec.start from original jail.conf
- stop.d - scripts for execution within jail when jail is starts. Analog of parameter exec.stop from original jail.conf
- remove.d - (since CBSD 11.0.10) scripts for execution on remove command
Write scripts to the master_\* directories can be useful if at the start-stop jail you need to perform some action is not associated with content of environment - for example, create a ZFS snapshot, put rules in IPFW and etc.
In scripts, you can use CBSD variables, such as $jname, $path, $data, $ip4_addr, for example, by placing a script (with execute permission) in /usr/jails/jails-system/jail1/master_poststart.d/notify.sh:
                #!/bin/sh
                echo "Jail $jname started with $ip4_addr IP and placed on $path path" | mail -s "$jname started" [email protected]
You will receive notification upon startup cells by email: [email protected]
The functionality of execution custom scripts and the availability of variables in environments can play a big role in the integration of CBSD and external applications, such as Consul
As an example of use, see the article Example of using CBSD/bhyve and ISC-DHCPD (Serve IP address in bhyve through pre/post hooks)
As an example of use, see the article Example of using CBSD/jail and Consul (Register/unregister jail's via pre/post hooks, in Consul)
starting and stoping VM
commands: bstart, bstop
                        % cbsd bstart jname=vm1
                        % cbsd bstart vm1 vm2 ... vmX

                        % cbsd bstop jname=vm1
                        % cbsd bstop vm1 vm2 ... vmX
Description:
bstop command send SIGTERM signal to virtual domain for soft shutdown. In the event that the virtual machine does not stop during hard_timeout (by default: 30) seconds, CBSD will terminate the process forcibly. Use noacpi=1 args for instant/hard poweroff (without sending SIGTERM) virtual environment or hard_timeout=X to change the interval wait for soft off
Running virtual machines happens when you start cbsd/server automatically if parameter astart (auto-start) corresponding VM is set to 1 This setting can be through cbsd bconfig or cbsd bset. When you stop the server or service cbsdd, automatically stops all running virtual machines. Running VM manually by the command:
% cbsd bstart jname=vm1
or
% cbsd bstart vm1
or
% cbsd bstart vm1 vm2 vm3 ..
(to run multiple virtual machines as a command)
If the start/bstop command run with no arguments, this will list all inactive/active VM for interactive selection
If you have the appropriate build of FreeBSD and CBSD not less 11.2.0, you can take advantage of instant start of the virtual machine from checpoint, bypassing the boot phase. To do this, use the argument checkpoint= with name of checkpoint
Priority launch environments
Commands: jorder, jorder-tui, border, border-tui
% cbsd jls display=jname,b_order
Description:
Sometimes a jail/vm will require an already running service from another machine/jail before it is launched. Examples might be a database SQL or a running LDAP.
In this case, you can edit Boot Order (b_order in jail/vm settins)
By default, all environments are created with b_order set to 10 (which is defined in the profile and can be changed)
If you need jail2 to be launched before jail1, its value for b_order must be set to a lower one than that of the second jail.
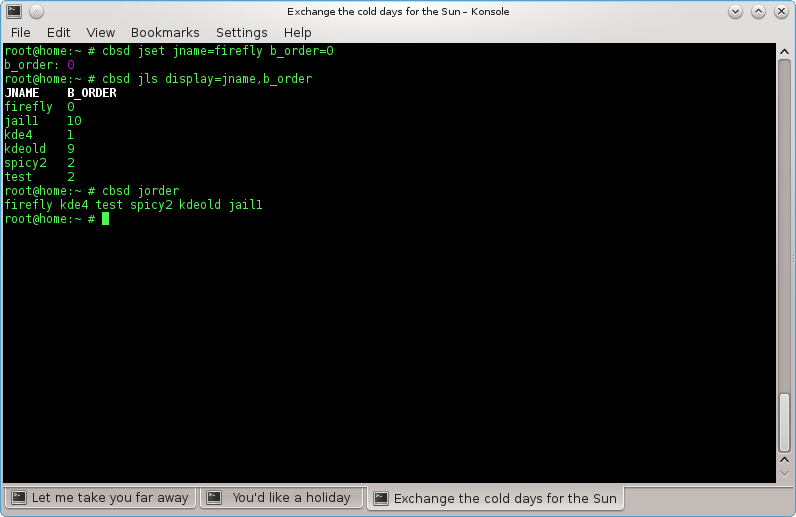
You can display the current configuration with the command jls:
% cbsd jls display=jname,b_order
JNAME    B_ORDER
firefly  3
jail1    10
kde4     1
kdeold   9
spicy2   2
test     2
This sample configuration will launch kde4 first while jail1 will come up last
You can also display the sequence using the command jorder
% cbsd jorder
In what sequence jail printer - in this sequence they will run
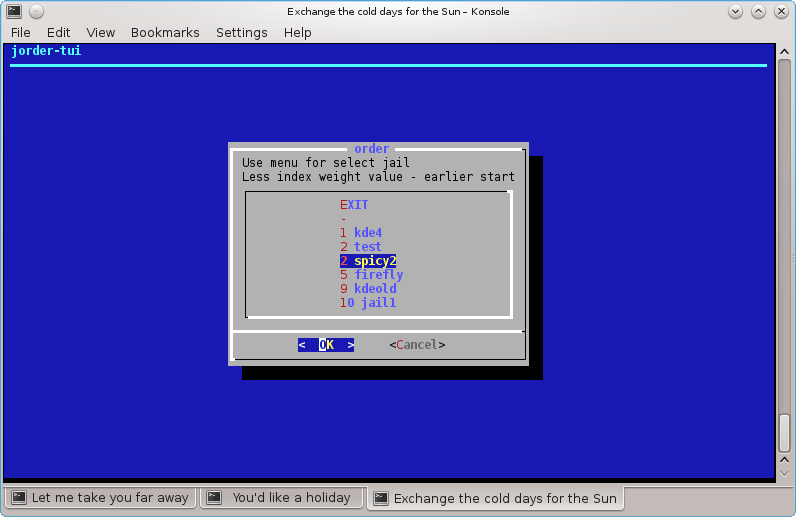
To edit a launch sequence use jset or the TUI-editor jorder-tui
To edit bhyve priority, use the commands border or border-tui
Removal Virtual Machine
command: bremove
% cbsd bremove jail1 jail2 ..
Description:
Removing a virtual machine affects all files in one way or another connected with the VM:
- a) directory or ZFS fileset with images of virtual machine
- b) statistics and the description of the virtual machine
- c) snapshots, if it was
In case when bremove runs on a running virtual machine, the work of the guest OS is automatically interrupted.
Example:
% cbsd bremove redhat1
Virtual Machine Renaming
command: brename
% cbsd brename
Description:
Performs renaming the virtual machine and the corresponding directory data in the new name. Can be executed only on the inactive virtual machine. As required parameters:
- old — old VM name
- new — new VM name
Example (renaming debian1 VM into debian50:
% cbsd brename old=debian1 new=debian50
List of Virtual Machines
comannd bls
% cbsd bls
Description:
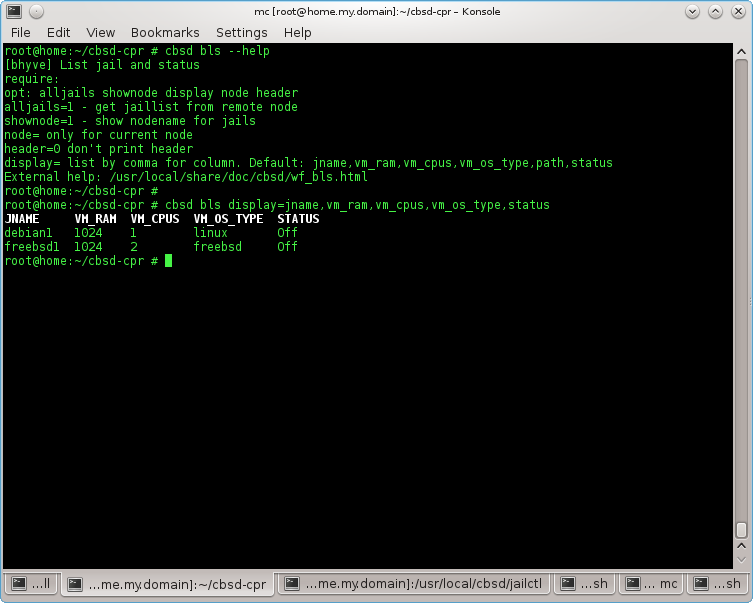
Displays the list of virtual machines on the local node or all of the added nodes. through argument display you can specify the fields to fetch the data. If display not specified, the value specified in the file $workdir/etc/defaults/jls.conf, which you can change at its discretion through $workdir/etc/bls.conf
All possible parameters for samples described in the file $workdir/share/local-bhyve.schema
- JNAME — Name of virtual machine
- VM_RAM — memory space, in MB
- VM_CPUS — The number of virtual CPU cores
- VM_OS_TYPE — Guest OS type
- PATH — directory in which there are images of hard disks of the virtual machine
- STATUS — state of virtual machine
If added to the local server RSA/DSA keys remote node, you can display all the virtual machines in the farm through
% cbsd bls alljails=1
or
% cbsd bls alljails=1 shownode=1
to display the name of the node that hosts this virtual machine.
Example:
% cbsd bls
Using VNC to connect to the bhyve virtual machine
Commands bconfig, bconstruct-tui
                        % cbsd bconfig
                        % cbsd bconstruct-tui
Description:
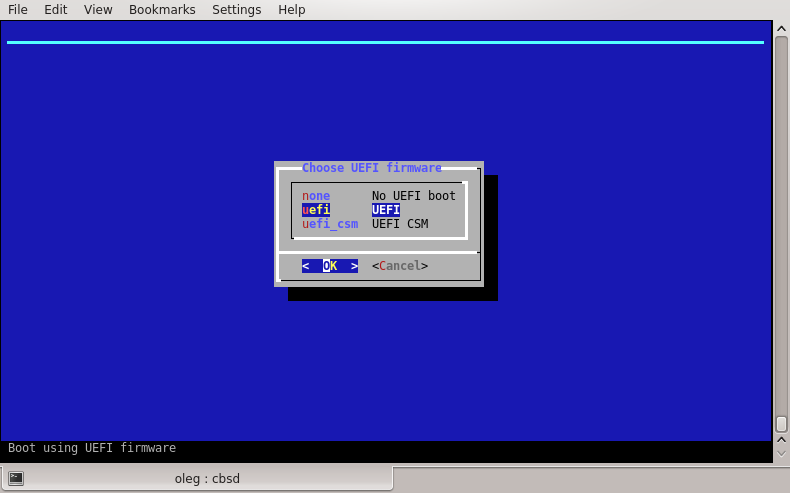
Currently, VNC is possible only when the virtual machine startup through UEFI mode
To do this, when you create a new virtual machine (or editing through bconfig), make sure that:
value of vm_efi set to uefi:
If you want to fixate the VNC port, use the menu item vm_vnc_port
If vm_vnc_port set to 0 - CBSD automatically find the first available port for the VNC connection
If vm_vnc_port set to 1 - CBSD it will not open a port for VNC
If vm_vnc_port any other numerical value, for example 5905 - CBSD will always use current VNC port for a virtual machine
Beginning with CBSD version 11.1.0, a VNC connection requires a password that is specified in the vnc.conf configuration file (~cbsd/etc/defaults/vnc.conf):
In order to change (or remove) the password, duplicate your own value of default_vnc_password via ~cbsd/etc/vnc.conf file:
% echo default_vnc_password='test' > ~cbsd/etc/vnc.conf
If default_vnc_password takes an empty value, the password for the VNC was not set.
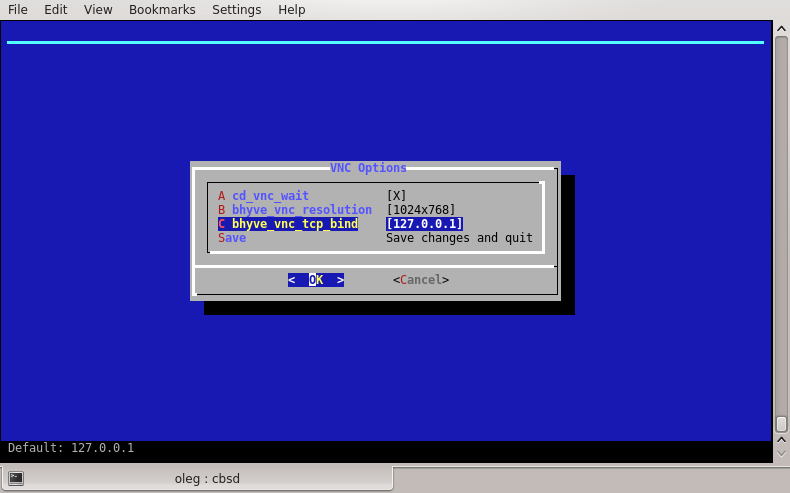
Note that by default, the VNC port opens on loopback address: 127.0.0.1
This is done for security reasons, or any user can connect to the VNC conclusion of your virtual machine
To connect to the VNC on a remote server, please use SSH tunnels, or any proxies that are protected by a password or a certificate
If you want to work with VNC directly, just change the parameter bhyve_vnc_tcp_bind from 127.0.0.1 to 0.0.0.0 via vnc_options menu. In this case, to connect the port to be opened all
Attaching to terminal
command: blogin
% cbsd blogin
Description:
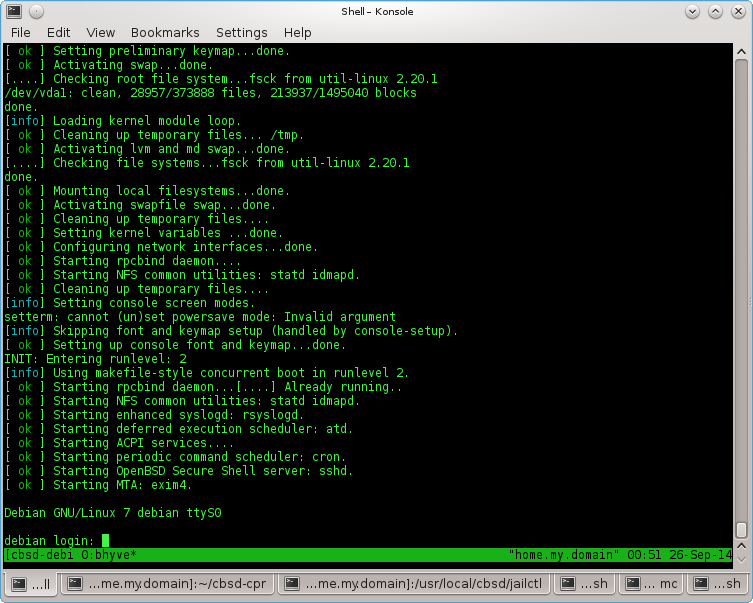
Execute tmux session, connecting to the console output of the virtual machine
To disconnect from the terminal (and off tmux session), press the key combination: Ctrl+b, d (Hold Ctrl press b, release both key and hit d)
Example:
% cbsd blogin debian1
You can customize the command, redefining the action on you more suitable
This is achieved through the configuration file blogin.conf and the parameter login_cmd.
The file can be placed for the individual environment in the directory $workdir/jails-system/$jname/etc (for example, virtual machines belong to different system administrators, and you can use different logins when connecting via ssh), and globally, overwriting the value from $workdir/etc/defaults/blogin.conf. To do this, create a file with your configuration in the directory $workdir/etc/
With a custom call, you can use CBSD variables - for this or that environment
For example, if you want instead of the standard behavior, when the blogin launched the VNC client, the file $workdir/etc/blogin.conf can look like this:
login_cmd="su -m user -c \"vncviewer ${bhyve_vnc_tcp_ipconnect}:${vm_vnc_port}\""
If you want the ssh connection to occur, this file might look like this:
login_cmd="/usr/bin/ssh your_user@${ipv4_first}"

Cloning a Virtual Machine
command: bclone
% cbsd bclone
% cbsd brclone
Description:
Performs cloning a virtual machine to a new one. As required arguments, specify source/original VM through old and a new name as an argument new
Attention: Since 11.0.10 version, CBSD on ZFS-based hosters will be use ZFS clone features!
ZFS clone features is ultra fast operation (thanks to Copy-on-write), but imposes some restrictions - you will be dependent on the parent snapshot. If you try to remove parent environment, CBSD automatically executes the zfs promote command, but when you works with snapshot independently - just keep it in your mind
You can control this behaviour via clone_method= argument or, to set it globally, use rclone.conf and bclone.conf to overwrite settings from 'auto' to 'rsync':
                % echo 'clone_method="rsync"' > ~cbsd/etc/rclone.conf
                % echo 'clone_method="rsync"' > ~cbsd/etc/bclone.conf
When ~cbsd/etc/bclone.conf (for bclone) and ~cbsd/etc/rclone.conf contain:
clone_method="rsync"
Clone will not use zfs clone even on ZFS filesystem and you will get full copy via rsync

Example: Cloning a virtual machine in debian1 to debian2:
% cbsd bclone old=debian1 new=debian2
Virtual Machine EXport
command: bexport
% cbsd bexport
Description:
Export the VM file (* .img). The argument jname the name of the virtual machine. img-file is saved in the directory $workdir/export. The original VM after exporting remains unchanged.
EXample (export VM debian1 to $workdir/export/debian1.img):
% cbsd bexport jname=debian1
Virtual Machine Import
command: bimport
% cbsd bimport
Description:
Import from image (* .img) virtual machine. The argument jname the full path to the file or the name of the image (without extension .img), which must be located in the appropriate directory ($workdir/import). img-file after the import is still in place. Additionally, you can import a virtual machine from an image in the alternate name (for example, you want to deploy the image of the debian1 from debian1.img, however, your system already has a VM with the same name). In this case, use the argument newjname
Example:
Import virtual machine from the file /tmp/debian1.img:
% cbsd bimport jname=/tmp/debian1.img
Import debian2.img placed in $workdir/import under new name debian5:
% cbsd bimport jname=debian2 newjname=debian5